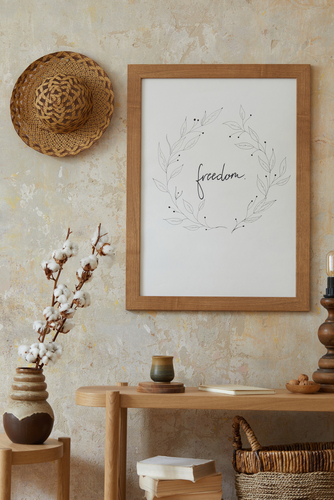
How to Hang a Picture Frame

Hanging picture frames can be a daunting task, especially if you want to ensure that they are level and securely mounted on the wall. However, with the right tools and techniques, you can easily hang picture frames like a professional. In this blog post, we will guide you through the step-by-step process of hanging a picture frame, from selecting the right location to ensuring stability.
1. Choose the Right Location
The first step in hanging a picture frame is to choose the right location on your wall. Consider the size of the frame and the wall space available. You want to make sure that the frame is not too small for the wall, nor too big that it overwhelms the space. Additionally, think about the height at which you want to hang the frame. Generally, eye level (around 57 to 60 inches from the floor) is a good rule of thumb, but you can adjust it based on your personal preference and the height of surrounding furniture.
2. Gather the Necessary Tools
Before you start the hanging process, gather all the necessary tools. You will need a hammer, a measuring tape, a pencil, a level, and picture hanging hardware such as nails or anchors and screws, depending on the type of wall you have. It’s essential to have everything ready to avoid interruptions during the process.
3. Measure and Mark the Wall
To ensure proper placement, measure the dimensions of your frame and mark the corresponding points on the wall where the top corners will be. Use a measuring tape to measure the desired height from the floor and make a small pencil mark. If you are hanging multiple frames in a gallery style arrangement, mark the positions of each frame accordingly.
4. Attach the Picture Hanging Hardware
Now it’s time to attach the picture hanging hardware to the frame. Most frames will have a hook or wire on the back for easy hanging. If your frame doesn’t have any built-in hardware, you can purchase hanging kits that come with hooks and wire, or adhesive hanging strips for lightweight frames. Use a measuring tape or ruler to ensure the hardware is centered on the back of the frame and securely attach it.
5. Hang the Frame
Once the picture hanging hardware is attached to the frame, it’s time to hang it on the wall. Start by holding the frame against the wall, aligning it with the marked points. Check with a level to ensure that the frame is straight. If you’re hanging multiple frames, you can use a laser level to make the process even easier. Adjust the frame’s position until it’s perfectly level and centered, and then lightly trace along the bottom edge with a pencil.
6. Hammer the Nails or Insert Anchors
Once you’re satisfied with the frame’s position, carefully place it aside, and using your pencil marks as a guide, hammer nails directly into the wall (if it’s made of plaster or drywall) or insert anchors with screws (if it’s a concrete or brick wall). The nails or anchors should be positioned just below the pencil line. Make sure they are in firmly and evenly, ensuring the frame’s stability.
7. Hang the Frame and Check for Levelness
Place the frame back on the wall, aligning the hanging hardware with the nails or anchors. Slowly let go of the frame, ensuring it hangs securely. Use a level to double-check its levelness and make any necessary adjustments. If your frame has a wire, you can also use this step to adjust the tension of the wire for a straight and stable hanging position.
8. Step Back and Enjoy
Lastly, step back and admire your work! Take a moment to ensure that the frame is perfectly level, and that you are satisfied with its placement. If you notice any imperfections, you can always make small adjustments to ensure a flawless presentation. Now you can proudly display your favorite artwork, photographs, or memories on your freshly hanging picture frame.
Summary
Hanging a picture frame may seem like a task that requires professional expertise, but with the right approach and attention to detail, anyone can do it. By choosing the right location, gathering the necessary tools, measuring and marking the wall, attaching the picture hanging hardware, hammering the nails or inserting anchors, and finally hanging and leveling the frame, you can confidently hang your picture frames like a pro. So, grab your tools and give your walls a personal touch with beautifully displayed frames that bring your memories and art to life.
Need Furniture Assembly Services in Downtown Chicago, IL?
At Your Service Pros is a locally owned and operated company that values honesty and integrity in all aspects of business. Our dedicated team of professionals have over 15+ years of hands-on experience, to provide innovative ideas and suggestions tailored to your projects. Our services are customized to your individual needs, paying close attention to the details of each project that we are involved with, ensuring full customer satisfaction. Thank you in advance for your business. Contact us today to learn more about what we can do for you! We are looking forward to helping you get your project done with expertise and professionalism!